
Introduction
This page describes how to do various small image processing procedures.
Cropping with GIMP
- In the GIMP toolbox window, click the cropping tool button, which looks like this:

- In the image window, use the mouse to select the rectangular area you which to keep.
- If you wish to change the selection, then just move the mouse into one of the corners of the selection and drag it to the new location, as in this picture:
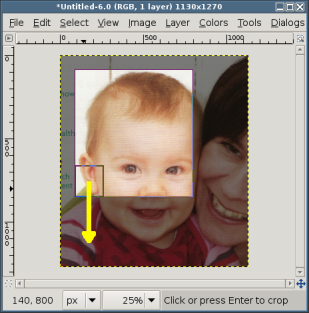
- When you are happy with the selection, click in the middle of the selected area and the it will be cropped.
Resizing with GIMP
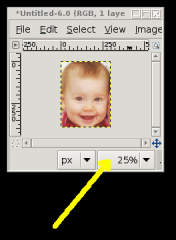
- Be aware that GIMP may already be scaling the image for display purposes only. You may want to adjust this to 100% so that when, in a minute, you make the real scaling, you will have a better idea of how the real end result will look. You can change this ‘display scaling’ from the pull-down menu shown in this picture:
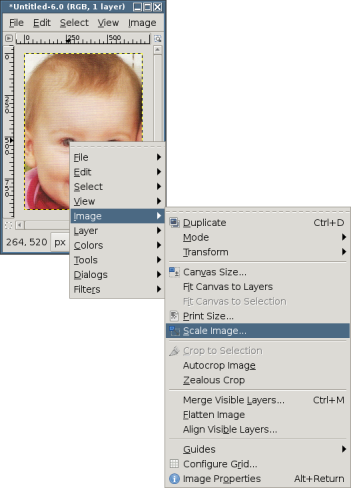
- Right-click on the image, go to ‘Image’, then ‘Scale image’, as in this picture:
- When the ‘Scale image’ window appears, either click the mouse in the Width or Height entry slots, enter a new value and press ENTER, or use the little buttons next to these slots to adjust the value. You do not need to adjust both the width and height; the other dimension will be adjusted automatically to preserve the aspect ratio. Then press the ‘Scale’ button. The image is resized.
Converting colour scans of black and white images to black and white with GIMP
The process of converting an image to black and white (whether that image is a colour image or a colour scan of a black and white image) is called desaturising. The scanner software (Xsane) can do desaturising but GIMP can do it better! So this procedure describes how to do it with GIMP. It assumes you have already acquired the image (from your scanner, from the internet or from your friends, etc) and have loaded it into GIMP.
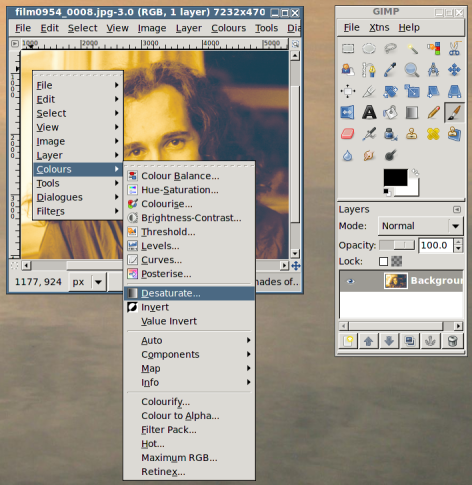
- Right-click on the image, go to ‘Colors’, then ‘Desaturize…’, as in this picture:
- This will bring up the ‘Desaturate’ window, which offers you the choice of which the image’s criteria should be used to decide the levels of greyness once the image is desaturised, as in this picture:
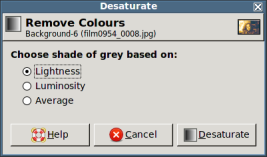
- Which criterion to use is a matter of experimentation (remember you undo an action by right-clicking on the image, going to the ‘Edit’ menu and selecting ‘Undo’ or by using the short-cut key CTRL-Z). Select the desired criterion and click ‘Desaturate’.
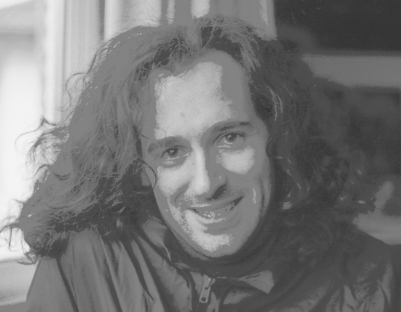
![]() Alexis Huxley found that, for scans of old black and white negatives, the ‘Luminosity’ option worked best, as shown in these examples; first the above image desaturated using the ‘Lightness’ criterion
Alexis Huxley found that, for scans of old black and white negatives, the ‘Luminosity’ option worked best, as shown in these examples; first the above image desaturated using the ‘Lightness’ criterion
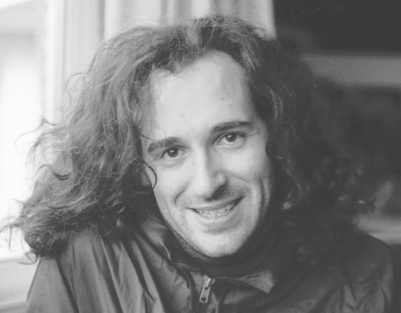
and here is the same image desaturated using the ‘Luminosity’ criteria
and here is the same image desaturated using the ‘Average’ criterion:
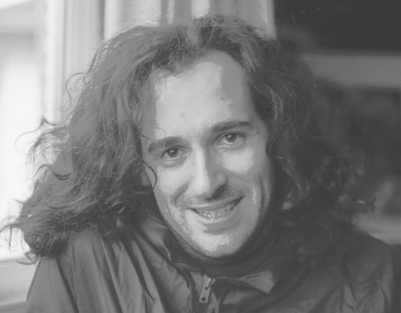
![]() When experimenting with which criterion gives the best results, looking at a part of the image which contains a face is best!
When experimenting with which criterion gives the best results, looking at a part of the image which contains a face is best!
Saving images with GIMP
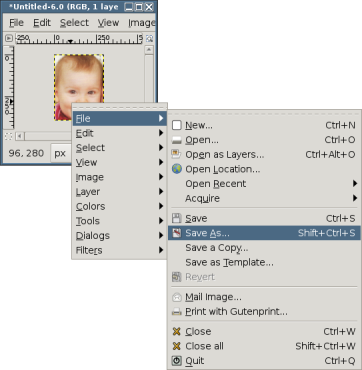
- Right-click on the image, go to ‘File’, then ‘Save as’, as in this picture:
- Browse your way to the directory into which you wish to save the image (double-clicking on directory names to descend into that directory, single-clicking on the horizontal list of parent directory names to ascend, clicking the ‘Create Folder’ button if you want to create a new directory, etc).
- When you are in the right location, enter the name of the file you wish to save the image as, with the .jpg extension, and click the ‘Save’ button. A small dialogue window will appear with some JPG-specific save parameters; just click ‘Save’ again.
Bulk rotating JPEGs using the commandline
- Cd to where the pictures are and run the following commands:
mkdir top left bottom right
thunar &
- Increase the icon size (CTRL-MOUSEWHEEL) so that the image icons’ orientations can be seen.
- Move all those that have the top of the photo at the top of the icon (i.e. they are already the right way up) into the ‘top’ directory, and move all those that have the top of the photo at the left of the icon into the ‘left’ directory, etc.
- Run the following commands:
for X in top/*; do cp $X .; done for X in left/*; do jpegtran -rotate 90 $X > ${X#*/}; done for X in bottom/*; do jpegtran -rotate 180 $X > ${X#*/}; done for X in right/*; do jpegtran -rotate 270 $X > ${X#*/}; done - Review the results.
- Revert the timestamps on the generated files by running:
for X in {top,left,bottom,right}/*; do touch -r $X ${X#*/}; done - If everything is okay then run:
rm -fr top left bottom right
chmod 644 *.JPG